What do I do with my students? How do I keep them engaged at this point in the year? I have the solution.
One of my favorite lessons happens around this time of the year. My students open up the time capsule they created in September. In it they answered a bunch of questions, so when they open it in June they see how their answers have changed to those questions.
It's one of my first lessons for the year. It's a quick way to get to know my students, and an easy way to introduce some slideshow tools.
One of the first slides is a Table of Contents listing all sorts of things about the student: their favorite movie, their best friend, how the first few days in a new school went for them. I then teach them to hyperlink those items to the corresponding slides in the presentation.
It's in their google drive for safe keeping, and right around now we open it back up again. Since they're mature, sophisticated, almost 7th graders, the answers they gave as tiny little newbie 6th graders sometimes make them laugh. They create new slides and answer the same questions again, noticing how much they've grown and changed over the course of the year.
It's a good lesson to show them how much they've grown, and to be proud of how far they've come in a year. I'm thinking I should create one for myself, and see how my answers change from the beginning of the year. After all, I should be growing too.
Showing posts with label google. Show all posts
Friday, May 4, 2018
Wednesday, December 20, 2017
One teacher’s approach to Digital Citizenship
In the beginning
When I
began teaching digital citizenship in 2010 it was an innocent time. We were
only worried about the students believing all websites were real. I directed
students to The
Dog Island website, where you could pack up your dog in a crate and send him
off for a week long romp on a beach. The site was very believable; pictures of
the dogs, and even information about how to ship your dog. There’s other sites
too; you can learn how to save the Pacific
Northwest Tree Octopus from extinction. They’re
cute, but harmless. There are other sites though that drift a little into the
lunatic fringe; Aluminum Foil Deflector
Beanie will prevent aliens from getting access to your brain, thank
goodness. This site would start a conversation about questioning resources.
I would
tell the story that Alan November wrote
extensively about; a student working on a Holocaust report used a website
created by a Northwestern University professor. The problem was the professor
believed that the Holocaust didn’t happen and the concentration camps were lice
disinfestation treatment centers. That was the beginning of the dark side of
the internet for me.
A year
later I found BrainPop which
had a great unit of Digital Etiquette. It was free, so I loved it. It was also
great because BrainPop is used by all subject teachers, so any teacher could
discover it and use it in their classroom.
Digital Citizenship
In 2012 I
noticed my students were behaving irresponsibly online. It wasn’t malicious
behavior, it was more not knowing any better, like using simple passwords and
leaving them around for other students to see. I found Common Craft videos
that explained Digital Citizenship concepts in simple straightforward ways, and
they’re awesome. I created a worksheet with items to locate from the videos and
my first true Digital Citizenship lesson was born! Since then I’ve gotten
fancier. Today my students create a slideshow from what they learn in the
videos., but it’s still a solid lesson I use every year.
I kept
looking and finding more and more resources. It was nice to see the educational
community addressing the issue.
CommonSense
came along, and they rolled out Digital Citizenship
curriculum and I was in heaven! They review all media for children, so they
know their stuff. They’ve broken it down into eight topics and leveled it for
grades K-12. There’s lesson plans, games, worksheets, even resources for
parents; you can get it all from their site.
I also
use Everfi, they
have a Digital Citizenship online module that students can complete at their
own pace. It’s relevant for today’s student; one piece has the student trying
to convince their friend to put down their phone and concentrate on driving. I
like assigning it for homework so parents end up sitting down next to their
kids and learning a few things too. The quiz at the end of the module is great
for assessing them and makes them accountable for the learning.
Code.org has even done their part!
In their coding curriculum, they have included a few key pieces about Digital
Footprints. In one lesson, the students stalk a few fake social media sites to
see how much information the fake teen has shared. It really models for them
what they should and shouldn’t be doing online. It hits home with many of my
students.
Google
recently released their curriculum, Be
Internet Awesome, which approaches the subject from an
empowering viewpoint and not a scary everyone-is-out-to-get-you approach. The
games are fun, and the students learn as they play. I haven’t mastered the
games yet so I still have work to do.
Just last
year, I was part of the team that created Digital Citizenship resources for NYC
teachers. We made infographics and activity books for teachers and parents to
use about the rules to follow when using the internet in school and at home. It
made me really think about how best to approach this subject as a student,
teacher, and parent.
From all
these years teaching Digital Citizenship, my philosophy could be boiled down to
this. Students will live online for a lot longer than we will, and they will be
creating a digital footprint that could follow them for decades. Trying to keep
them off the internet until they're old enough is as dangerous as keeping them
in the backseat of a car and then handing them the car keys on their 18th
birthday. We need to guide them as they learn to navigate the internet,
allowing them to make small mistakes now rather than big ones later. I
encourage them to put as much positive stuff out there as possible. They need
to create their own digital footprint, or someone else will do it for them.
Avoiding the issue is not the answer. Play offense, not defense. They should
develop their voice and share it with the world. That’s what I try to instill
in my students.
So
Digital Citizenship is not a subject that is required yet, but it obviously
should be. I’m hoping it’s a subject that any teacher can master, as long as
they have the support and training that’s needed. It’s too important of an
issue to just hope for the best. We’ve come a long way from just worrying about
Aluminum Foil Beanie websites, and we will be constantly trying to keep up. We
owe it to our students to prepare them for wherever they will go.
In the beginning
When I
began teaching digital citizenship in 2010 it was an innocent time. We were
only worried about the students believing all websites were real. I directed
students to The
Dog Island website, where you could pack up your dog in a crate and send him
off for a week long romp on a beach. The site was very believable; pictures of
the dogs, and even information about how to ship your dog. There’s other sites
too; you can learn how to save the Pacific
Northwest Tree Octopus from extinction. They’re
cute, but harmless. There are other sites though that drift a little into the
lunatic fringe; Aluminum Foil Deflector
Beanie will prevent aliens from getting access to your brain, thank
goodness. This site would start a conversation about questioning resources.
I would
tell the story that Alan November wrote
extensively about; a student working on a Holocaust report used a website
created by a Northwestern University professor. The problem was the professor
believed that the Holocaust didn’t happen and the concentration camps were lice
disinfestation treatment centers. That was the beginning of the dark side of
the internet for me.
A year
later I found BrainPop which
had a great unit of Digital Etiquette. It was free, so I loved it. It was also
great because BrainPop is used by all subject teachers, so any teacher could
discover it and use it in their classroom.
Digital Citizenship
In 2012 I
noticed my students were behaving irresponsibly online. It wasn’t malicious
behavior, it was more not knowing any better, like using simple passwords and
leaving them around for other students to see. I found Common Craft videos
that explained Digital Citizenship concepts in simple straightforward ways, and
they’re awesome. I created a worksheet with items to locate from the videos and
my first true Digital Citizenship lesson was born! Since then I’ve gotten
fancier. Today my students create a slideshow from what they learn in the
videos., but it’s still a solid lesson I use every year.
I kept
looking and finding more and more resources. It was nice to see the educational
community addressing the issue.
CommonSense
came along, and they rolled out Digital Citizenship
curriculum and I was in heaven! They review all media for children, so they
know their stuff. They’ve broken it down into eight topics and leveled it for
grades K-12. There’s lesson plans, games, worksheets, even resources for
parents; you can get it all from their site.
I also
use Everfi, they
have a Digital Citizenship online module that students can complete at their
own pace. It’s relevant for today’s student; one piece has the student trying
to convince their friend to put down their phone and concentrate on driving. I
like assigning it for homework so parents end up sitting down next to their
kids and learning a few things too. The quiz at the end of the module is great
for assessing them and makes them accountable for the learning.
Code.org has even done their part!
In their coding curriculum, they have included a few key pieces about Digital
Footprints. In one lesson, the students stalk a few fake social media sites to
see how much information the fake teen has shared. It really models for them
what they should and shouldn’t be doing online. It hits home with many of my
students.
Google
recently released their curriculum, Be
Internet Awesome, which approaches the subject from an
empowering viewpoint and not a scary everyone-is-out-to-get-you approach. The
games are fun, and the students learn as they play. I haven’t mastered the
games yet so I still have work to do.
Just last
year, I was part of the team that created Digital Citizenship resources for NYC
teachers. We made infographics and activity books for teachers and parents to
use about the rules to follow when using the internet in school and at home. It
made me really think about how best to approach this subject as a student,
teacher, and parent.
From all
these years teaching Digital Citizenship, my philosophy could be boiled down to
this. Students will live online for a lot longer than we will, and they will be
creating a digital footprint that could follow them for decades. Trying to keep
them off the internet until they're old enough is as dangerous as keeping them
in the backseat of a car and then handing them the car keys on their 18th
birthday. We need to guide them as they learn to navigate the internet,
allowing them to make small mistakes now rather than big ones later. I
encourage them to put as much positive stuff out there as possible. They need
to create their own digital footprint, or someone else will do it for them.
Avoiding the issue is not the answer. Play offense, not defense. They should
develop their voice and share it with the world. That’s what I try to instill
in my students.
So
Digital Citizenship is not a subject that is required yet, but it obviously
should be. I’m hoping it’s a subject that any teacher can master, as long as
they have the support and training that’s needed. It’s too important of an
issue to just hope for the best. We’ve come a long way from just worrying about
Aluminum Foil Beanie websites, and we will be constantly trying to keep up. We
owe it to our students to prepare them for wherever they will go.
Saturday, November 25, 2017
Thursday, September 21, 2017
My tech lesson when the internet is down
You have a great lesson planned for today, and the internet
is down. Your supervisor is lurking in the doorway, you can just smell the
observation coming. What do you do?
You teach your kids how to create
hyperlinks with just PowerPoint or Google Slides!
Here’s my plan.
Begin the lesson with having the students create the first slide, a “Table of Contents” sort of slide. Mine looks like this.
![]() |
Here's the basic slideshow to start with.
This can be a template that you send them
or make them create it themselves.
|
Instruct them to then create the rest of the slides, adding information about themselves. I like this lesson towards the beginning of the year so I can get to know my students quicker.
![]() |
Choose the correct slide to link each bullet point.
|
I model how they then highlight the text “Where I was Born”
and choose Insert-Hyperlink. They link it to the slide titled “Where I was Born.” I
model another one, but most kids get it and finish the rest of the links
themselves.
This is great, but it only links them out to the slide, not back to the homepage. So to complete the project I have them create a Home link button on one of the slides, insert the hyperlink to the TOC page, and then copy and paste it to the rest of the slides.
![]() |
| Insert-Autoshape to create the Home Button. |
This explains how hyperlinks work, and how a website can be built, all without the internet.
It works well for me, and I hope it helps you out too.
Sunday, August 27, 2017
I'm a certified bilingual nerd
I recently earned my Google
Level 2 Certification, and it felt great, but I'm just as proud earning my Microsoft
Innovative Educator Expert Badge for this year too. I like to say that I'm
bilingual: I speak Google and Office. Both prove I met certain requirements,
but they proved it in different ways.
You can earn your Google
Certification anytime you want, just pay the $25 and you have three hours to complete
the test.
The MIE Badge is only awarded
once a year so you have a long time to complete the tasks, but if you miss the
deadline you’re out of luck. I submitted my application 15 minutes before the
midnight deadline, cause I’m organized
and efficient. I knew about the deadline for MONTHS, yet there I am
cramming like it’s a final for a class. I’ll never change.
The Google Test is a bunch of multiple
choice questions and a pile of specific tasks you need to complete. Get enough
correct, and you’re in. Don’t assume this test is easy-it’s not. You may be great
at some Google products, but you need to know enough about ALL of them to pass.
Google does provide all sorts of study materials and sample questions to
prepare for the test, so if you do your homework you can pass it. I didn’t pass
Level 2 the first time, you can read about my humiliation here.
Microsoft has a bunch of
courses that you can take, just complete a certain amount of them. You watch
videos, or complete interactive tasks, and there’s usually a short quiz at the end.
The quiz will tell you whether you got the questions right or wrong as you go,
and you can retake the quizzes if you don’t pass the first time. There’s over
100 different courses and badges you can earn along the way. The final piece
for their certification is to create a two-minute video or Sway on how this process
has influenced you and how you will implement what you’ve learned in your
classroom.
Both methods of assessment
were effective in their own way. I proved I can do specific tasks and had
specific knowledge of Google products, but Microsoft just wanted to make sure I
knew about all the things that were available to me and how I can be a better 21st
century teacher for my students. I only really had to prove what I knew by
creating a Sway, which are very cool things, by the way.
The Google test gives you the
results within seconds, the longest few seconds of your life.
The Microsoft results were
released a month after the deadline.
The Google Badge email shows
up a day later, the Microsoft Badge shows up with the congratulations email.
The Google Certification is a
personal thing, you earn it for your own gratification.
The Microsoft Badge is a
global event. If you are connected to Microsoft in any of the many social media
ways you can be, you will see that people in India, Germany and Mexico got
their badges the same day you did. It made this planet feel a lot smaller
seeing proud teachers from all around the world showing off the same badge as you.
So, I have my nerd cred from
both Google and Microsoft. I learned a lot from both processes, and I am a much
better teacher for it. It’s vital that teachers remain students, it’s the only
way we learn.
Tuesday, July 25, 2017
Monday, July 24, 2017
The painful sting of failure
So, I took the Google Certified Level 2 Exam last year and failed
it by 4 points. That stung.
I was embarrassed,
I pouted, and felt sorry for myself. (Yes,
my life is a living hell.)
But after a few
hours, I got over myself and realized that this is a real learning experience. I
thought about what failing feels like to my students. Do they feel the way I do
when they fail?
The difference between their tests and mine was that I got another
chance at the exam. You know I was prepared for it this time. The first exam
showed me what skills I did poorly on, so naturally I will always remember
those even more than the ones that came easily to me.
Shouldn't my
students get another shot at tests in my class? Wouldn't they do much better
the second time around? Retaking a test made a big difference in my learning, I
think my students deserve that same opportunity. I’m going to allow more retaking
of certain tests in my classroom. Mostly, I’m going to work on creating
assessments that check for understanding without the pass/fail stigma attached
to them.
Fast forward to
this year. I took the test again. I was anxious; how embarrassing would it be
if I failed again? I faced my fears, I studied harder this time, and with the
help and support of my NYCDOE colleagues, I passed.
I learned so much,
and not just from Google.
Wednesday, May 10, 2017
What I've learned from tiny little dictators
These North Korean officers are standing there proudly and why shouldn't they? They're wearing enough bling on their uniforms to set off metal detectors.
If you notice along the side of my blog, I've got some micro-credentials: Google, Microsoft, CommonSense, etc. I'm proud of the work I've done to earn them and to display the badges on my blog. I realize that my students should get the same opportunities. Technology class grades are usually not a big deal on report cards, so I have to make them a big deal in my room.
I have some graphic design experience, so I created some badges for my students. When they finished certain modules online, or mastered a unit of work, I've created a badge for it. Google Classroom makes it easy to email just those students I select, and I send them a congratulations email with the badge linked to it. I tell them to post their badge to their blog, and it gets the rest of the class racing to see how fast they can get one too.
Learning something new should be it's own reward, but sometimes it's nice to show off a little.
We're all still looking for little gold stars.
Wednesday, February 8, 2017
How Blogger gives every student a voice.
I use Google Classroom in my technology lab almost all day, everyday. It's a great tool. I've personalized each class with a portrait of the kids. Here's some of my little knuckleheads.
I also use many other Google tools. After the students get their school gmail account, we go over how to create documents in drive and how to share them. The students then set up their blog in Blogger. That takes at least one class period since we have to set up each URL address individually so it works correctly.
Once they have a Blog address, I paste into a google sheet I've set up in the "About" tab in classroom site. Every student can access this spreadsheet, not just me. (I did lock the sheet, so they don't accidentally delete anyone).
I also use many other Google tools. After the students get their school gmail account, we go over how to create documents in drive and how to share them. The students then set up their blog in Blogger. That takes at least one class period since we have to set up each URL address individually so it works correctly.
Once they have a Blog address, I paste into a google sheet I've set up in the "About" tab in classroom site. Every student can access this spreadsheet, not just me. (I did lock the sheet, so they don't accidentally delete anyone).
This part is where real communication occurs. They're not just writing for me; their whole class is the audience now. Now their posts get a comment from me and from their peers. To make sure everyone gets comments, I ask each student to comment on the person listed above and below them on the roster. The next blog post might get commented on by the names two spots above and below. Eventually, everyone has read and commented on each blog.
This method has worked really well for me. It's my way of helping my students develop their voice.
Saturday, August 6, 2016
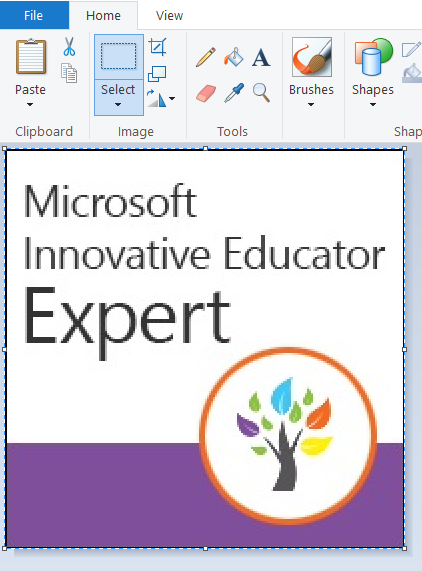
4 Steps to make your profile pic look really professional
When I first added logos to my profile picture, I just
simply did it in Preview on a mac. It was effortless. Once people saw my
profile sporting my nifty badges to show off my accomplishments, everyone
wanted to know how to do this and I wanted to help. Here how it’s done through
Paint. Yes, lowly little Paint.
Step
1: Open your photo in the program.
Step 2: Open your logo in another window and “Select All” and then
choose “Copy.”
Step 3: Go back to your photo and “Paste” the logo. Keep it selected
or it becomes stuck in the photo. Resize it, move it, whatever you need.
Keep the other images small, you don’t want to turn into a scrapbook page.
Step 4: After you’re happy with everything, save the file.
Voila, you’re branded! Here’s what my finished profile picture looks like on
Twitter.
You can stop reading now and go play with it. You too can turn your profile picture into a mini resume. A picture can say a thousand words and a branded one can help you make sure they’re the right ones for your image.
Subscribe to:
Posts (Atom)